Page History
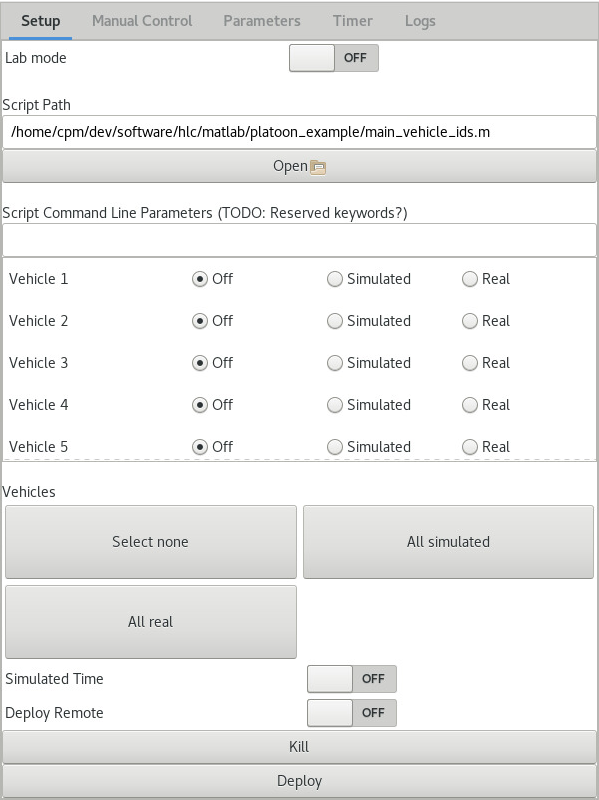
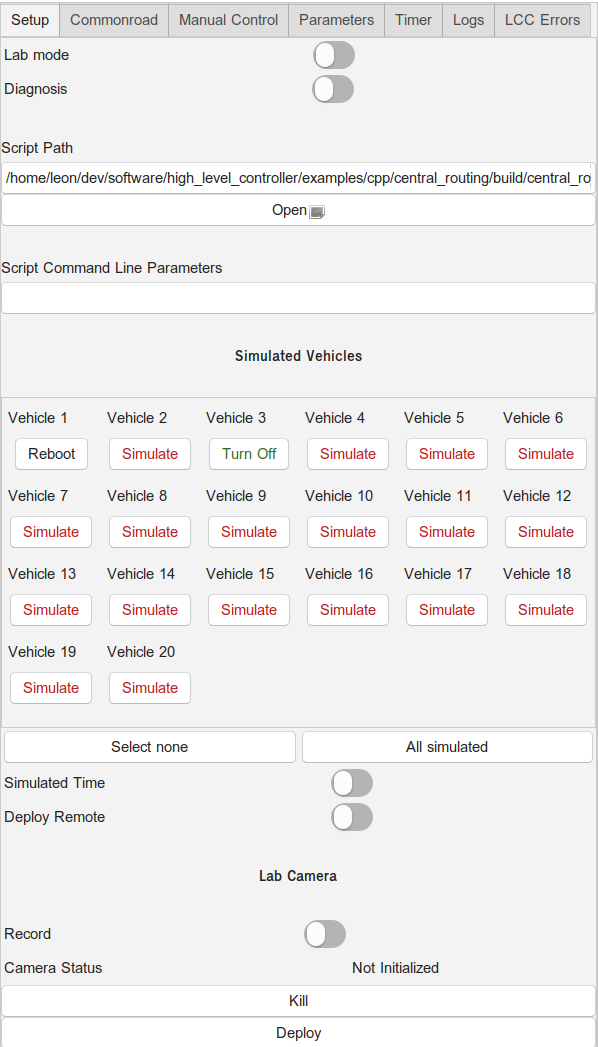
The setup view allows to launch all components required to perform a simulation from within the LCC's GUI. It can also be used for real vehicles, and to deploy your selected program or script remotely on the NUCs (HLCs).
| Info |
|---|
Deploy Remote is now called Deploy Distributed |
Selecting a Script
A single script can be selected by editing the path text field or selecting a file using the Open button. In the file chooser, you can select whether you want to use an executable or a Matlab script in a drop down menu at the bottom right of the window.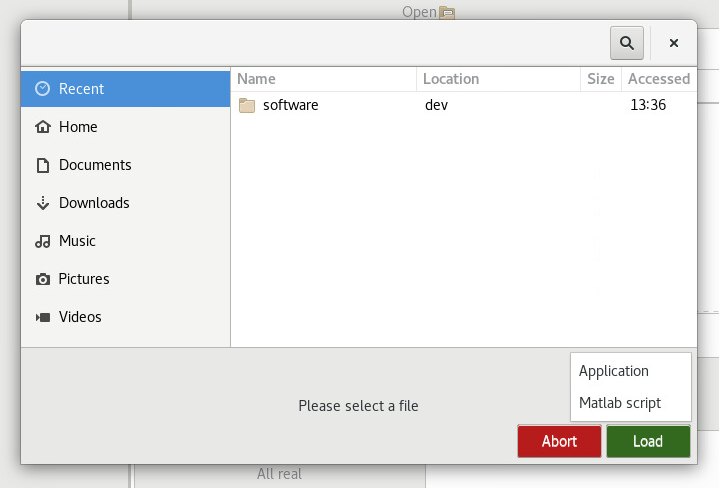 .
.
The file chooser remembers your previously selected file.
If no script is selected (empty string as script path), the LCC will only start the Middleware. You can run your script yourself outside of the LCC, connect to the Middleware and then start the simulation.
Required Script Properties
...
| C++ | Matlab |
|---|---|
| RTI DDS: (your_params, varargin) eProsima: (your_params, middleware_domain_id, varargin) |
Most of the required C++ parameters are used to set values for the cpm library. Of these parameters, you are probably only interested in the list of vehicle IDs your program is responsible for (--vehicle-ids). The same is true for the matlab script, where varargin gives you a list of vehicle IDs - any other parameters, which come beforehand, are custom.
The Middleware domain ID can currently only be set consistently in the eProsima Branch, the functionality might not be added to support RTI w.r.t. Matlab, although the change would be rather small (you can adapt your Matlab scripts accordingly), as the Lab will change to using eProsima only in the future.
Further parameters can be specified in the text field below the Open button. If you need to access these command line parameters in your C++ program, simply use the Command Line Parser and --your_param= in the text field. Custom arguments can be set by yourself this way during testing / for your simulations. Matlab custom arguments just need to be passed in a comma-separated fashion (e.g.: 1, 155, 3).
...
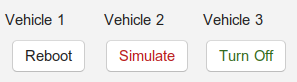
You can select, for each vehicle individually, whether they should be ignored, simulated, or if a real vehicle is used with that vehicle ID during the simulation. control their current state if they are real vehicles.
| Simulated Vehicle |
|
| Real Vehicle |
|
The buttons below the scrollable view allow you to set the state for all (non-real) vehicles at once.
Vehicles that are set to be off will be ignored by your script, as their IDs are not passed to it. You do not need to start the simulated vehicles - the LCC does that for you immediately after selection. They are killed when the LCC is closed or when another mode (real or off) is chosen.
| Info | ||
|---|---|---|
|
...
If you have not started the LCC with the correct parameters (e.g. use the main server DDS domain), you might not be able to connect to / see the real vehicles. |
Simulated Time
This switch should be self-explanatory - if you want to use simulated time, turn it on, else turn it off.
...
The IPS tracks the real vehicles, so it should be turned on if real vehicles are used. In any other case, it should stay turned off.
Deploy
...
If you select this option, the behaviour of the whole deployment fundamentally changes. Your software is no longer deployed locally, on your device, but on the NUCs (HLCs) which are used in the Lab. Your system must be set up similarly to the main Lab PC for this option to actually work. The following requirements must be fulfilled.
- The main Lab PC (IP: 192.168.1.249) must be running (with an Apache Server), ideally before the NUCs are turned on. The middleware, cpm library and autostart software must be built - the build script puts data required for the software to work on the NUCs in folders that allow the NUCs to download it from the Apache Server (/var/www/html/nuc).
- Your folder structure must match the recommended folder structure (usage of ~/dev/...) for both the cpm library and the software repository. If your script/program relies on this data, then you should always refer to other programs using paths relative from ~ (so do not use /home/username explicitly). Cpm library and middleware can be found in the same folders on the NUCs.
- All required data must lie in the same folder as your executable or script. The whole folder containig it gets uploaded to each NUC. If you depend on other data (except for the Middleware or cpm library, which are uploaded separately), put it in that folder, or your program might not work correctly. WIP: Set folder from which on all data should be uploaded, name script within that folder separately
- If you use Matlab then you need to use the init script to load required data and to setup or reader and writer and include it in your own script folder, or - alternatively - use a script that is inspired by the init script. QOS_LOCAL_COMMUNICATION.xml is always located in ~/dev/software/hlc/middleware/build, and precompiled DDS IDL Matlab files can always be found in ~/cpm_base/cpm_lib/dds_idl_matlab. Other files can not be expected to be found on the NUC, unless you put them in the same folder as your own script.
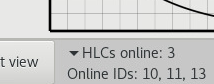
- The UI indicates how many NUCs are online. Vehicle IDs are matched to available NUC IPs in an ascending order (IP ...211 → ID 1, IP ...215 → ID 4), depending on the vehicle IDs you have selected. The UI shows you how many NUCs are currently online (matching might take up to a minute after the NUCs have been booted and your program has started.) You cannot simulate more vehicles than NUCs are available - each NUC is always responsible for one vehilce only. Else, please use local deployment (or start additional scripts locally manually).
The location of the cpm library is always set using LD_LIBRARY_PATH in the local terminal - you do not need to take care of this in your program, as long as you have linked the library properly.
| Info |
|---|
The HLCs use a startup script that takes the cpm library and the Middleware from an Apache server located on the Lab's main PC. The according files are updated every single time that these components are built. If you changed them during the lab run / if they are missing, please rebuild them and restart the NUCs/HLCs, so that they get the new software. This decision was made to reduce upload traffic when files are uploaded to the HLCs during a lab run. |
Lab Camera
...
Distributed
This option includes a lot of features, thus we created an own page for it. If this switch is set, your program gets uploaded to the NUCs / HLCs for deployment, instead of being deployed locally on your machine. One script instance handles one vehicle (ID) per NUC / HLC.
Lab Camera
Turn the "Record" switch on before clicking "Deploy" to record your experiment.
After stopping the experiment with a click on "Kill", you will find the video file in the /tmp/ foldercpm_lab_recordings .
If you are planning to play the video on windows without installing codecs, convert the video e.g. with
| Code Block | ||
|---|---|---|
| ||
ffmpeg -i $INPUT_NAME_WITH_FILE_EXTENSION$ -ss $START_IN_SECONDS$ -t $DURATION_IN_SECONDS$ -c:v libx264 -strict -2 -preset slow -pix_fmt yuv420p -vf scale=trunc(iw/2)*2:trunc(ih/2)*2 -f mp4 output.mp4 |
Deploy / Kill
When you have finished your setup, you can launch all the components / scripts by clicking on Deploy. Not all software starts immediately then. Some, e.g. those that rely on the Middleware, wait until you start the simulation in the Timer Tab. (Wait for the program to show up there before you start the simulation)timer). Due to initialization and synchronization, it makes more sense to wait for all participants before starting the timer.
Local: This starts several tmux sessions that run the required scripts. These sessions are terminated when you press on Kill. A stop signal is sent to all timers when the kill button gets pressed.
Remote: The folder in which the script is located gets uploaded to the NUCs if you choose to deploy the software remotely. Each HLC/NUC script gets assigned a single vehicle ID. IDs are given in ascending order regarding the selected vehicle IDs and the available HLC IDs. Not all vehicles might be controlled, if not enough NUCs are online. Middleware and Script are deployed on the HLCs, simulated vehicles, IPS and CloudDiscoveryService are deployed on the local machine.
| Info | ||
|---|---|---|
| ||
To execute your software, you often need to Deploy → Switch to Timer Tab → Wait for the Middleware to show up → Start the Timer |
...
| Info | ||
|---|---|---|
| ||
Always use Kill after you have finished, or else some software might end up running on a system (like the NUC / HLC) until it is restarted. |
Overview
Content Tools